Tuesday, September 15, 2009

My Current Labor of Love: Part 2

A couple days ago I gave you a brief tease as to what I'm making Mr. T for our one-year anniversary (if I can keep it a secret long enough!)  And even though it's not done yet, I thought I would share with you the progress I'm making so far.

If I can't tell him, I might as well tell all of you right?!!  Maybe that will control the urge I have to tell him all about it!

So Mr. T, if you're reading this....hit the road.  I'm sure you have some grad school homework to work on, right??  Love you!

As you might have figured out, I'm working on a t-shirt quilt.  I took all of his tshirts from his days of playing football at Illinois, and cut them up!!  He had them sitting in a pile in his room, not being worn, because he didn't want to ruin them.  I ran this past him before, and he even knew I cut them all up, but we had both forgotten about them since then.

So instead of him wearing his tshirt to threads, I'm preserving them in a quilt we can use for years to come.  (Cheesy, right? Don't worry...I know).

Step 1:  Cut your tshirts.  I made these into 14" by 14" squares.
The quilt I'm making is 4 squares across, by 5 squares down, so I used 20 shirts.
Step 2:  Draw out your design on paper...trust me, it helps!!
By laying it out on paper, and color coding my pieces, it helped me figure out what I would need.
So as you can see (click on it to enlarge) I needed 15 pieces that measure 14" by 5 1/2".  Then I also needed 16 pieces measuring 14 1/2" by 5 1/2" of the same color.  For the little squares in between, I needed 12 pieces measuring 5 1/2" by 5 1/2" and those are done in a different color.  I'll talk about the outside later, because I haven't made it that far yet in the project.
Step 3:  Cut out all the pieces I mentioned above.  The way I found my measurements was this:
For the vertical pieces: make them the same length as the tshirt square (14").  For the width, choose it to fit your style (5"), and add 1/2" for seam allowances (5 1/2").
For the horizontal pieces:  Make them the same width (5 1/2") and add 1/2" to the width of your square (14 1/2").
For the squares:  These should measure the same width as the rectangles (5 1/2")
Step 4:  Start by sewing across your pattern vertically.  Sew one vertical piece to the right side of the first tshirt square with a 1/4" seam allowance.  Sew the other edge of the vertical piece to the left side of the 2nd tshirt square.
Continue piecing it together, working across the pattern.
For each horizontal row you should have 4 tshirt squares and 3 vertical pieces (blue).  So with my pattern, I had 5 strips when I was finished.  Make sure to iron open all of your seams before moving on!
Step 5:  Piece together the rows that will go in between the tshirt rows.  Do this in the same way, sewing a horizontal piece, to a square, to a horizontal piece to a square, etc.  Make sure you use the same 1/4" seam allowance.
Following the pattern, you should have a strip of 4 horizontal pieces and 3 squares.  There will be 4 of these strips.  Make sure to iron open all of your seams before moving on!!
Step 6:  Pin together one tshirt strip to a blue and orange strip.  You want to make sure that your seams match.  The orange square should match up with the vertical blue piece.  Pinning here is crucial so that your intersections come out nice and even on the front side. 
Notice the ironed open seams....it makes for easier line up. 
If you place your pin directly through the seam into the second seam, they tend to line up well.
Step 6:  Sew across with a 1/4" seam allowance.
Here's what your corners should look like if you do it correctly.
Step 7:  Continue doing this until you have all of the strips sewn together.
My puppy dog Pepper made it into the picture!
So there is the first part of the face of the quilt.  I still need to sew the outside edges before it can be attached to the back.  But there are only so many hours in one weekend, and I had to come back to school.
I'll share the next steps with you as they happen!!

Monday, September 14, 2009

DIY: Hair Flower

I have been on a crafting roll lately and I have one more project to share with you!!  I made a hair flower to wear during the reception after I take off my veil.

This project was inspired by another Weddingbee creation...this time I used Miss Mascara's tutorial.

I forgot to take pictures along the way, but basically I followed her directions step by step.  The only thing I changed, was that I layered different types of material to get the look I wanted.

Here is my finished flower!! I used white satin, a wide tulle netting, white organza, and a pretty white lace.  I added green and white beads to the center of it, and sewed it onto a comb.
And here's what it looks like in my hair:
I need to play with it a little more to get it to lay the way that I want...but otherwise I'm very happy with the way it turned out!
Price Breakdown:
1/8 yard white netting: $0.16
1/8 yard white satin: $0.62
1/8 yard white organza: $0.62
1/8 yard white lace: $0.62
Hair comb: $1.29
Green beads: $1.29
White beads: $1.29
TOTAL: $5.89
So as you can see it was super cheap!! If I had these beads laying around the house it would have been even cheaper!! But now I'll just have to find something else to use them for =]
There is still enough left over from each fabric to make another hair flower, if I'm not totally happy with this one.
What are you guys doing?? Are you going the traditional veil route, or are you wearing something else in your hair??

Happy Anniversary!!!

I just wanted to take a minute and wish my parents a "Happy 24th Anniversary!!"
Here they are 24 years ago on their wedding day.
And here they are 24 years later!
I've been so lucky to have such an awesome example of a loving and caring relationship in my life.  I just want to say thanks Mom and Dad for showing me that marriages do last when you try hard enough! 
I love you both, enjoy your day!

Sunday, September 13, 2009

DIY: Keepsake Garter

So everyone knows you need a garter on your wedding day.  Even if you're not doing a garter toss, it's still fun to have those couple of cute shots when you're taking pictures.

Well I wasn't about to spend a whole bunch of money on one when I had material laying around and a fully functioning sewing machine at my disposal.  So this afternoon I sat down and made the garter I plan on keeping.  I'm also going to make one to toss at the reception, but I didn't get that far today.  (Had to drive back to school and such.)

So here goes....
Start by cutting a piece of elastic to fit comfortably around your thigh. (Make it a little snugger than you might think, because you don't want it falling down when you walk around...I learned this by trial and error!)  I used a 1" piece, because that's what was laying around my house. 
Cut out the fabric you want for your base color.  I had bought this green satin when it was on sale at Joanns about a month ago.  I cut it 8" wide and it is as long as the width of the material.  So about 32"??  I wasn't sure how much I would need, but I ended up only cutting off about 4 inches.
Put your right sides together and sew down the edge.  Give yourself about a 1/2" or more seam allowance because the satin does tend to fray.
Turn your "tube" inside out.
Iron the tube flat so you have a nice edge at the top and bottom.  I left my seam on the front because it is going to be hidden by the next step.  And instead of ironing so it was in the middle, I put it about an inch from the top so I had a guide for the white coming up next.
Pin the next color of your choice just above the seam (About an inch from the top).  I wanted the ruffle on the bottom to be bigger from the top.  I happened to have this 1 1/2" satin ribbon laying around with the sewing stuff and it was exactly the length I needed.  You could do this with fabric too, but the ribbon has a nice finished edge on both sides.
Then I sewed the top and bottom of the ribbon to the green, allowing about an 1/8" from each white edge.  This left a pocket a little wider than 1" for the elastic to fit through.
Stick a safety pin on the edge of your elastic and send it on its way through the "pocket".  I put it between the two green pieces instead of directly under the white ribbon so you wouldn't be able to see it.
Then you just need to sew the two ends of elastic together and close up the back seam.
And there is my garter, void of any embellishments...but they will be coming soon!! I just haven't figured out what I want to put on it.
So there ya have it... a finished garter!!  It only took me about 10 minutes to throw it all together, and I had all the supplies on hand, so basically it was free.  It is a little bit wider than I had originally planned, but I'm only going to wear it for a couple pictures, and then put on the toss one for the reception.
I'll make sure and let you all know what it looks like when I put the finishing touches on it!!
My mom told me I should go with white, but I wanted to incorporate our wedding colors...are any of you straying away from the all-white bridal garter??

Saturday, September 12, 2009

My Current Labor of Love

I always love coming home from school for the weekend because I get to work on fun projects!! My sewing machine is here along with a lot of other things I don't feel like hauling back and forth to school. 

So of course, last night I was up late working on a little something for Mr. T

(This would be your cue to scoot love!!)

This is a project I started working on a few months ago and then never got around to finishing.  I think it will be the perfect gift to give to him for our one year anniversary coming up in November.  That is, if I can keep it a secret long enough.  I'm sure I'll want to tell him or show him as soon as it is done.

I can't show you what it is yet, because a.) it's not done, and b.) I can't upload any pictures to the computer while I'm at home.

But I will give you a little teaser as to what I'm making....

It involves about 20 of these....
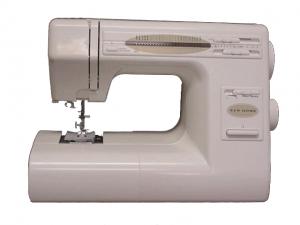
Lots of time at one of these....
And incorporates this!
So there ya go....I'm sure you've probably figured out what I'm working on, but I'm going to wait to clue you in until it's all finished!!
Do any of you find it hard to keep a secret from your guy when you have a really good gift??!

Friday, September 11, 2009

A Girl's Best Friend....and I'm not talking diamonds!!

So I know I haven't told y'all yet, but Mr. T and I are currently about a month into a 4 month stretch where we won't be seeing each other!! Yes....4 whole months.  That's a looong time in our world.  I mean, heck! we met, fell in love, and were engaged in four months!  So for us, it's huge!

I'm back in Illinois for my FINAL semester of college, and Mr. T is up in Minnesota for his first semester as a grad student!  He just started his master's in Educational Leadership and is working as a grad assistant coaching football.  So when you enter in his crazy busy schedule (he works 12+ hours every day!! and travels for games most weekends) my broke college student bank account, and the 10 hour drive it would require for me to get up there (which would be hard to squeeze into one weekend without missing any classes).....seeing each other just isn't going to happen!

So as you can imagine it's been really hard not seeing this beautiful face every day....
Sorry Mr. T...but it's those silly faces I miss the most!
So we've been putting in the time every day on the phone.  And I don't know about you guys, but for us it's been really hard to talk for more than like 20 minutes because we just get to missing each other all over again and it really sucks!!

Enter: MY LIFESAVER!

This adorable little guy came in the mail earlier this week, and ever since, I have been in love!!  For the low cost of $19.99 and free shipping, I now have access to Skype...the most awesome invention.  For those of you who aren't aware....it's a free download that lets you video call your loved ones for free.

Since Tuesday, I would say my life has improved by like 100%  hahah that might be exaggerating a little, but I got to see Mr. T for the first time in over a month, so excuse me if I'm like a giddy school girl!!

So now I get to talk to and see Mr. T any time I want!! (More like when he's not super busy at work)  So the other night we were talking and I was addressing all of my Save the Date postcards, and it was almost like he was there helping me out.
By the way, Mr. T,  you realize how lucky you are being so far away and not having to help out with any of this wedding stuff right?!!  I thought so.

So.....moral of the story: I'm a happy girl now that I get to "see" Mr. T on a daily basis...and you all should get Skype!

What ways have you found to deal with long distance relationships?? And are any of you as big of fans of Skype as I now am??

Thursday, September 10, 2009

DIY: Save the Date Postcards

Well.... they're done!!!  I posted a few weeks ago about the dilemma I had designing my postcards.  And after getting input from some of you and the lovely ladies over at Weddingbee...I finalized the layout.  Back on August 28th I ordered my postcards from Vistaprint.  I chose the slow order option (21 days) because it was the cheapest. 

They came in the mail this week!! Only 10 days after I ordered them =]

Here's how they turned out:

Here's the first pile of 100.

Here's a closer view of the front.

And here's the back!

I added in "Hope to see you there! -Josh and Kristin" to the space on the back of all 200 to make it a little more personalized.  Then I went through and addressed all 130 of them!  Now they just need stamps and they will be on their way out.

I am absolutely thrilled with the way they turned out.  The picture quality is wonderful, and the front is glossy.  They're much better than I could have printed myself.  And a whole lot less work.  I would highly recommend using Vistaprint for any of your projects.

I'm still considering this project DIY because I designed it myself, and then simply uploaded it and had them printed.  So really.... I did all the hard work!

I got 200 postcards for $30.00  I came in $20 under the budget I allotted for my Save the Dates.

Wednesday, September 9, 2009

"Initially" I Wasn't Sure....

...but I went ahead and ordered our two initials from Joann Fabrics.  (See what I did there??! "Initially" our initials...ha, hilarious I know)  I talked about my indecision on wedding wreaths a couple posts ago, and while I'm still not sure which way I'm going to go, I ordered a "J" and a "K" online last night.
They were only $3.99 each, and I had an email that gave me free shipping!! That's why I just had to go with it, even though I'm still not sure what I'm going to do with them, or where I'm even going to put them for that matter.  It's always the shipping that gets you, and I can never find these in the store.  So what the heck!!  (I feel like I always order things I probably don't need when there is free shipping, because I feel like I'm getting such a great deal...anyone else??)

So we'll see what comes of them!! They should be here in the next couple of days.  By the way, I'm sure my mailman just loves me, because I've been getting packages very frequently lately....love it!!

 Here are some ways I can go with my new purchase:
Incorporate the initials with a wreath...decorated of course!
Cover the initials with flowers, or tissue paper flowers.
Cover them in a coordinating fabric.
Cover the J and K in moss for an earthy feel.
So really, this is one of those things I just haven't thought through yet, but I'm totally going with it!!  I'm hoping that when they get here in the mail, the creativity will just hit me.  It kind of tends to happen that way.  So when I figure it out, I will definitely let you all know!

Are you decorating with monograms anywhere throughout your wedding??

Friday, September 4, 2009

Have a Safe and Happy Labor Day Weekend!!

Just wanted to pop in before I take off for the weekend and say bye to y'all!!  I'm headed up north to WI to spend the weekend on the lake =] 

This time tomorrow I'll be relaxing on the water with a drink in my hand.  (And yes, we start drinking before noon when we're camping and continue on through the night!)

I'll be doing some boating....
..and playing some bags...
...and enjoying quite a few of these =]
Sounds like the perfect, long weekend to me!
See you all on Tuesday!! Have a great and SAFE weekend.

Thursday, September 3, 2009

A Fun Giveaway

The Roddy Bride is having a give away over on her blog.  Two lucky readers will win  a 24"X24" wall sticker.  You can turn a favorite picture, your wedding monogram, or whatever else you might think of into a multi-surface, peel and stick Wall Sticker.  Head over to her blog now to enter and for more details.  You must enter by September 11 to be eligible. 

Mr. T's Wedding Band

.....or what has the potential to be, anyways.
Mr. T and I haven't picked out our wedding bands yet.  And to be quite honest, we're really not in any rush to.  I mean, I'd love to go buy my pretty, sparkly ring, cause what girl couldn't use more diamonds??!  But I know that when we get them home they'll sit around our house tempting us to try them on early.  Mr. T, maybe not so much, but I know I definitely won't be able to keep my finger away from it until the wedding.  And that's just a little too much temptation for me! We have done some light browsing to get an idea of what will look good with my ring, but haven't really put any effort into what Mr. T might like.

Last night I was inspired by a post from Miss Apple Cider (or Mr. AC really) on Weddingbee who bought her hubby-to-be's wedding band from an artist on Etsy.  For those of you not familiar with Etsy, it is "your place to buy & sell all things handmade" (<-- pulled that right from the website!)  It is quite fantastic, and I highly recommend you check it out.  You can find anything there, and if it's not there, you can request that someone make it for you.
But anyways, here is the ring that Mr. AC got.
Walk With Me by artist: artisanlook
Gorgeous, right?!
Well don't think I didn't rush right over there to see what other magnificent creations I could find.  And here are a few I came up with, and then e-mailed to Mr. T.
Love Story by artist: artisanlook
Hawaii Titanium Ring by artist: Hawaiititanium
Hammered Titanium Ring by artist: Hawaiititanium
Titanium Ring by artist: titaniumknights
Titanium with Sterling Silver Inlay by artist: titaniumknights
The best part about all of this, is that a lot of rings I was seeing were down as low as $45 for a titanium ring.  I'm not going to surprise Mr. T with his ring or anything like that because, let's face it, he has to wear it for the rest of his life =] and I wouldn't want him to hate, or only kind of like it.  I want him to love it so much he never wants to take it off.  So I'm just simply sharing ideas with him, and eventually he'll find the ring he loves.  I hope!
What ring is your hubby wearing or going to wear?

Wednesday, September 2, 2009

A Pillow for the Ring Bearer

Okay, so I think y'all are getting the idea by this point that I don't like to do things the easy, store bought way.  And plain and boring just ain't my style.  So, of course, I'll be making the pillow for our ring bearer to carry down the aisle.

First I want to introduce the little guy to you (or who we're hoping will be our ring bearer-I still need to ask!!).  He is my cousin's son, and so adorable!  He will be around 3 1/2, I believe, by the wedding next year.
Liam
So, ya know, I can't just go with a plain white pillow.  That would be waaay too boring, and I wouldn't get to do anything!  So I started looking for unique alternatives.
I fell in love with this immediately.  It takes the "bear" in ringbearer literally and incorporates a childhood teddy bear.  I started thinking about all the stuffed animals I have stored away at home and if there were any cute little bears that could work, but unfortunately there aren't (I was more of the stuffed puppy kind of kid).  And I think it's cheating to go out and get a new teddy bear for this.  Kinda defeats the purpose.
So although I've given up, I kept the picture around, because it's just so cute!
I like the simplicity of this, while it is still very pretty.  If I were to go this route, I would probably make the pillow green and the bow black to match our colors.  And there are green hydrangeas so I could even make an exact replica if the creative juices aren't flowing!
There are a few things I love about this pillow, beside the fact that it is just gorgeous!  It is made of felt which I think is awesome.  I loooove the sheared edges (correct sewing term? Probably not, but I was too lazy to Google it.)  And the flower is just too cute.
The only thing I'm concerned about is getting carried away and ending up with a pillow that is too girly for my little man to carry down the aisle.  But I'll try and keep myself in line.
A DIY post will follow sometime in the near future, so you guys can see what I come up with!!
Have you guys come up with any unique solutions to the ring bearers pillow??

Wedding Wreaths...

.....what do you think of them?? Love them, hate them, couldn't care less about them?

Usually when I think wreath (not that I think about them all the time or anything, or hardly ever before this wedding!), Christmas always comes to mind.  Growing up we never really had decorative wreaths anywhere, they always just made their appearance during the holiday season.  So I'm not entirely sure what my opinion is of them for a wedding.  But I have come across some very cute pictures post-engagement that are starting to push me towards using them.
There are so many different options.  Do I go with the tried and true, circular floral wreath?? Or do I create the cute initial that so many have done lately??  Or would a mix of both suit me better? And if I go with the initial, do I cover it in flowers or moss??
So many options, and I'm really not leaning one way or another.  I guess it's a good thing that I have plenty of time to figure it out.
We have a set of double doors to the front of the church so I really want to hang either two wreaths or a "K" and a "J" for our initials.  I think if I did floral wreaths though I would want them to be real, which probably isn't in our floral budget.  If I went the other way instead, and DIYed initials I could probably do it at a pretty minimal cost.
Lots to think about!!
Are any of you doing wreaths or initials to decorate your church doors and reception??
Related Posts with Thumbnails