Monday, April 19, 2010

DIY: Escort Cards, Revisited

Hey all...it's been forever I know...but I have been following all of you, I've just been to lazy to post anything lately.  So I'm sorry!

But I'm back, for awhile anyways.  I'm going to be crazy busy from now until the wedding...I can't believe it's only 33 days away!

But anyways, I showed you all my escort cards quite awhile back.  If you don't remember, they looked like this:
I was planning on having these all laid out on a table when you first walked in, and each guests' table number would be on the inside.
Well I've since decided against that, and I'll be doing something a little different to show each guest to their table.
But I did realize that we'll need cards at each seat, because we're offering a choice between two entrees and we'll need a way to differentiate that so the waiters know who to serve what.  Our event coordinator recommended doing a little rhinestone or sticker or something on each card, but I wasn't really a fan of any of those options.
So I'm going to do this same design, with a different tent for each entree.
The green tents are for the chicken entree, the black for the steak, and the white is for the kids meals.

I sat down the other day and got done all of the people that have RSVP'd so far.
These will be put at each seat, but I'm going to try to figure out a way to let people know that they are free to move around at their table, they just need to make sure their tent follows them.


Are any of you dealing with multiple entree issues??  How are you distinguishing the two choices?

Monday, April 5, 2010

I actually have something worth sharing!

Hey all...remember me??
Sorry I've been gone for so long, but there really hasn't been much to post.  I'm still in the middle of a million and one projects, so I'll wait until they're finished to share.
I did mail out the invitations about a week ago, so look forward to hearing about those shortly!
But in the meantime, I do have a project I want to share with you that I didn't have anything to do with.  It's kind of hard to imagine because I've had such tight reins on everything wedding related, but this one was out of my hands.  All I saw was the finished product.
Mr. T's mom took on the task of making banners to hang in the church for the ceremony.  She had made some previously for all the boys' confirmations, but those were just out of felt and very simple.  This time she went above and beyond.  She ordered a pattern off the internet, bought all of the fabric, heat'n'bond, adhesive, etc. and went to town.  I think she finished these in about a week once she got started on them.  She picked the pattern, I okayed it, and she went for it.
Here are the results. 
They look amazing and I can't wait to see them hanging in the church.  She also had a great idea to put a "patch" of sorts on the back of one banner with our names, date, and the church.  Then we'll share them with all of our siblings, cousins, etc that would like to use them and add a patch for each couple.  I think it's a great idea and can't wait to be the first!
It's kind of nice to let go of the reins from time to time when you're surprised with awesome results like these!  I just need to remember as it gets closer and closer, that I don't have to do EVERYTHING by myself.

Friday, March 26, 2010

Cards for Satori


I made this card for Satori after hearing her story from her mom on Twitter.  Here's what she has to say.


Her story below as written by her mom:
"For those of you who don't know me, my name is Melissa Lewis, Haut Totes on Etsy, as well as Hauttotes on twitter.My 10 year old daughter Satori has Spinal Muscular Atrophy (type II) She uses a power wheelchair, can't walk, crawl, etc. Despite that she's a rock star!! She has a super sense of humor, gets straight A's even though she misses an average of 40 days of school a year! She's a great sister & daughter & a fantastic person all around. Because she is so physically weak her body doesn't hold its self up well and she has developed severe scoliosis. The curve of her spine it is now starting to crush her lung, so on March 31 she will have full spinal fusion. They will open her back from the neck all the way down, insert 2 titanium rods, one on either side of her spine, wire the whole thing up and place donor bone in between all the vertebrae. Eventually it will all grow together "fusing" her spine into one long bone. We are traveling to California to have this done, with an estimated stay in the hospital of 7-10 days. I am hoping to get people to send her postcards from all over. I think that the messages (and pictures) will be fun for her. I also plan to take an atlas and have her mark off states and countries (sneaking in a little geography). We have great insurance, a FANTASTIC surgeon and a world renowned hospital!!**Satori is not in need of anything more than some fun messages and exiting postmarks!**"
This is how the post card should be addressed:
Satori Lewis
Surgery date 3-31-10
Davis 7 Pediatrics
UC Davis Children's Hospital
2315 Stockton Blvd.
Sacramento, CA 95817 USA
**Be sure to include the surgery date**
 
If you've got some time to make a card, or you have a card or postcard laying around, send one out to her.  She'll be in the hospital for awhile after her surgery so this will give her something to do.  Remember how fun getting mail was when you were a kid?!  Help make her stay more enjoyable.


Friday, March 19, 2010

I Ordered My Veil!

MR. T.....THIS POST IS NOT FOR YOUR EYES....IT CONTAINS PICTURES OF ME IN MY DRESS, AND I KNOW YOU REALLY DON'T WANT TO SEE IT, NOR DO I WANT YOU TO!

This last trip home to IL, I was there for three weeks, and I took another trip down to Champaign to try on my dress again, pay it off, and bring it home.  My mom and Mr. T's mom were able to go with me and we made a night of it by going to Olive Garden afterwards.  Mr. T's mom had never been there before and she absolutely loved it!

A few weeks before my dress came in, I decided that I was going to attempt to make my own veil, because the one I had my heart set on cost about $200.  I figured if I got the right tulle it wouldn't be hard to do, it would just take a lot of time to bead the edges.  So I stopped and got some tulle from JoAnn's and went about cutting out the two layers.  Basically I just laid it out on the floor, folded in half lengthwise and cut a large "U" shape into it.  Then I sewed a running stitch at the top and pulled it tight so it gathered.  I made two layers, and sewed them together onto a comb and brought it down to try on with my dress.
At home I didn't think it was too bad, but when I tried it on with the dress I knew it wasn't going to work.  Compared to the veil I wanted, the tulle was much thicker/coarser/heavier/whatever and it was much fuller as well.  I knew I could have looked for a more delicate tulle and started over since I hadn't put much time into it, but I didn't want to take off the veil in the store, and my mom told me to go ahead and just order it.
It seems like now, some things are just a drop in the hat when you think about the overall budget.  My parents are being absolutely amazing about this wedding and I feel spoiled, but in a good way.  So now my veil is on order and I'm just waiting for it to come in!

Wanna see??  Of course you do, after listening to that long and boring story.
The third picture is the same veil, but in a single layer.  I decided to go with the double layer because I really think I'd like to wear it in front of my face while walking down the aisle.  Might as well go all out right?!

This is one project I'm glad I switched from the DIY list to the buy list.  One less project I have to do, and I know it will turn out perfectly.

Wednesday, March 17, 2010

Gifts for the Groomsmen

Mr. T has five guys standing up beside him on the day of our wedding.  His two brothers, a friend from grade school, and two guys he played football with at U of I.  They all mean a lot to him, and for the longest time we couldn't think of a good way to thank them for everything.
I wanted to leave the gifts up to him, since they were his brothers and friends, and he should know best what they would like/enjoy.  But he wasn't really coming up with anything, and I couldn't think of much either.  We popped into Things Remembered once and took a look at flasks and beer mugs, but just couldn't get on board with that idea. 
Then I thought it might be nice for them all to have a pair of Crocs that they could wear at the reception.  I said black, but Mr. T said since he and his brothers already have camo ones, that we should get the other three camo Crocs to match.  I was on board.  I even pulled them at work in the sizes we would need, and found a little pair for our ringbearer too.

But then I came up with a different idea and ran it past him.  Bean bag boards.  He was totally on board.  Yup, I signed up my dad to build 5 sets and my mom to paint the base color on all of the sets.  She's going to drive them all up to MN next week when she comes for my first shower so I can handpaint the designs on all of them.  I might be just a little crazy to take on a project like this with just over two months to go, but I think it's going to be awesome!
Here are a few of the boards I've painted over the last year.  Can you tell my family is from Wisconsin?!  Each board takes about 5 hours to hand paint each design.  So I'm looking at about 50 hours of work that I need to find a way to squeeze into my already busy schedule.
Oh and there's the matter of cutting and sewing all of the bags.  No big deal though.  Ha.

So even though I'm probably way crazy to take this on, I'm very excited about it.  We're going to do the Illini Chief head for two of the sets for the boys he played football with.  Then we'll probably do Chicago Bears for one set for his grade school friend.  And for his brothers, we haven't quite decided yet, but it will probably be some sort of buck/fish sort of thing.  So far my dad has all of the sets built, and my mom is going to start getting the boards painted so they'll be ready for me to put the finishing touches on them.
We're looking at about $50/set which isn't bad as a gift considering these could definitely be considered a $150 present.  I think they guys will love them!

Monday, March 15, 2010

My First Hair Trial

MR. T:
THIS POST IS NOT FOR YOUR EYES SINCE YOU WANT TO BE SURPRISED ABOUT EVERYTHING ON THE DAY OF OUR WEDDING =]  AND YOU WILL CATCH GLIMPSES OF MY DRESS IF YOU READ FURTHER...YOU'RE WARNED!


Those of you following me on Twitter may have already seen this, but I had my first hair trial the other week.  I settled on who is doing my hair for the day of the wedding, and we got together to practice since I really had no clue what I wanted to do.
A close family friend will be coming over to my parents' house on the morning of the wedding to do my hair, along with my mom and Mr. T's mom.  The girls have all decided to do their own hair/help each other with their hair.

I've known Theresa for ages, she actually used to babysit me when I was younger.  I ran into her one night downtown and we talked and it was decided!  She's actually going to do my hair for free as part of my wedding gift, and wouldn't take anything for my hair trial either when I went over to her house.
I brought along some of the hair inspiration pictures I've been gathering.  I had narrowed it down to two styles.  One was a low updo, and the other was a half-up updo.

I told her I either wanted something similar to the first one, or I wanted it EXACTLY like the second picture.  I decided for the first time around to do the low updo, because I just really wasn't sure what I wanted.  And obviously I was being wishy-washy because somewhere in the conversation we lost each other and she went ahead with the half updo.  And I'm really glad she did, because I absolutely loved it!  When it was done and we were looking at it, she even said if we wanted to run back to my house on the way to the reception, she would pin up all the hair into a low updo for me and it would only take about 10 minutes.

I get to be a two-hairstyle bride! How exciting?!  This way I can leave my hair down for the ceremony and wear my veil, and then it will be up off my shoulders for the rest of the night and I won't be too hot and worrying about the curls falling out.

Now for the pictures...
 Unfortunately, you don't get to see the front of it, because I don't have a picture of it.  It was after a long night in Chicago, I didn't have any makeup on, and my face and I were fighting.

I don't remember if I told you all or not, but I got a perm about a month ago because I was sick of my half curly hair and wanted a change.  It looks absolutely adorable now and I don't have to put any time into it, but Theresa said they must have left the solution in for too long because my hair is beyond unhealthy now!  So she sent me home with some good shampoo and conditioner and orders to get my hair trimmed and a good deep conditioner at a salon.  This way my hair will hold a curl better and look healthier and shinier on the day of the wedding.  So now I've got some work to do between now and then.

But I'm glad I went ahead and did this trial, because now I know for sure what I want.  All I have to figure out now is what I'm planning on doing with my makeup.  I'm really leaning towards having it done at a salon, because I really want eyelashes applied for the day and I'm horrible at doing them myself.  So we'll see what I decide on that. 
I would definitely recommend a hair trial though if you're stuck between a couple different ideas and you can afford to do it.  It will also give you a feel for how it will hold up throughout the day.

Have any of you done a hair trial before your wedding day??  What are your thoughts on it?

Wednesday, February 24, 2010

Another Bridesmaids' Gift

Hey guys!
I'm in and out a lot lately, so I haven't been to regular around here.  Just thought I'd pop in really quick and show you one of my latest projects.

I ordered 6 lime green towels from Kmart and paid just over $20 for the 6 and shipping.  I turned 5 of them into wraps for the girls to wear the morning that we all get ready.  I don't know what they're going to think, but I'm in love with them.   Personally, I stay wrapped in a towel after I get out of the shower while I'm doing my hair and makeup.  It will be nice to have one of these that stay velcroed on.
Sorry about the crappy photo quality!! I used my webcam because I left my computer cord in MN.

These have elastic in the back and about 5" of velcro at the front.  A cute black and white polka dot grosgrain ribbon runs down the front.  I sat down the other day and whipped all five of these out in about an hour.  It was a fun, quick little project.  I'm contemplating embroidering initials on the front, but I'm not entirely sure! 
The sixth towel I'm going to try and turn into a hooded wrap for my little flower girl.

On a side note, these girls are beginning to get a little spoiled!!

Monday, February 22, 2010

Thanks For Coming!

I think I may have hinted at our favors a time or two in the past, but I wasn't fully ready to share with you what was going on.  But now, I suppose there isn't any point in holding back.  It's not as if you guys are going to be there, and I'm ruining the surprise!

I'm going the photobooth route for our wedding.  And before you guys said you've heard it a million times (because I have too!) hopefully the little touches of me will make it stand out.

But, first, at the beginning.  I went to a bridal expo last May shortly after getting engaged.  I really wouldn't recommend it to anyone, I didn't get a whole lot out of it.  But what was there was a photobooth for everyone to try.  That was actually the first time that I had heard of one and thought it was just the coolest thing, and I HAD to have it.
But that wasn't going to happen for $900.  Absolutely not, especially since it was just a fun added bonus to the reception.

Then later in the summer I got an email from that company saying they were having a special going on for half price rentals.  I emailed them to see if they had my date available, and luckily they did.   I told myself I could justify it if I found a fun way to make it into a favor.  I was already budgeting to spend at least $1/guest which would be $300.  So for just a bit more, this became the option.

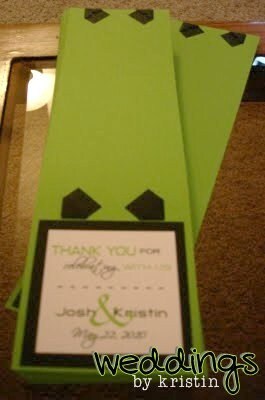
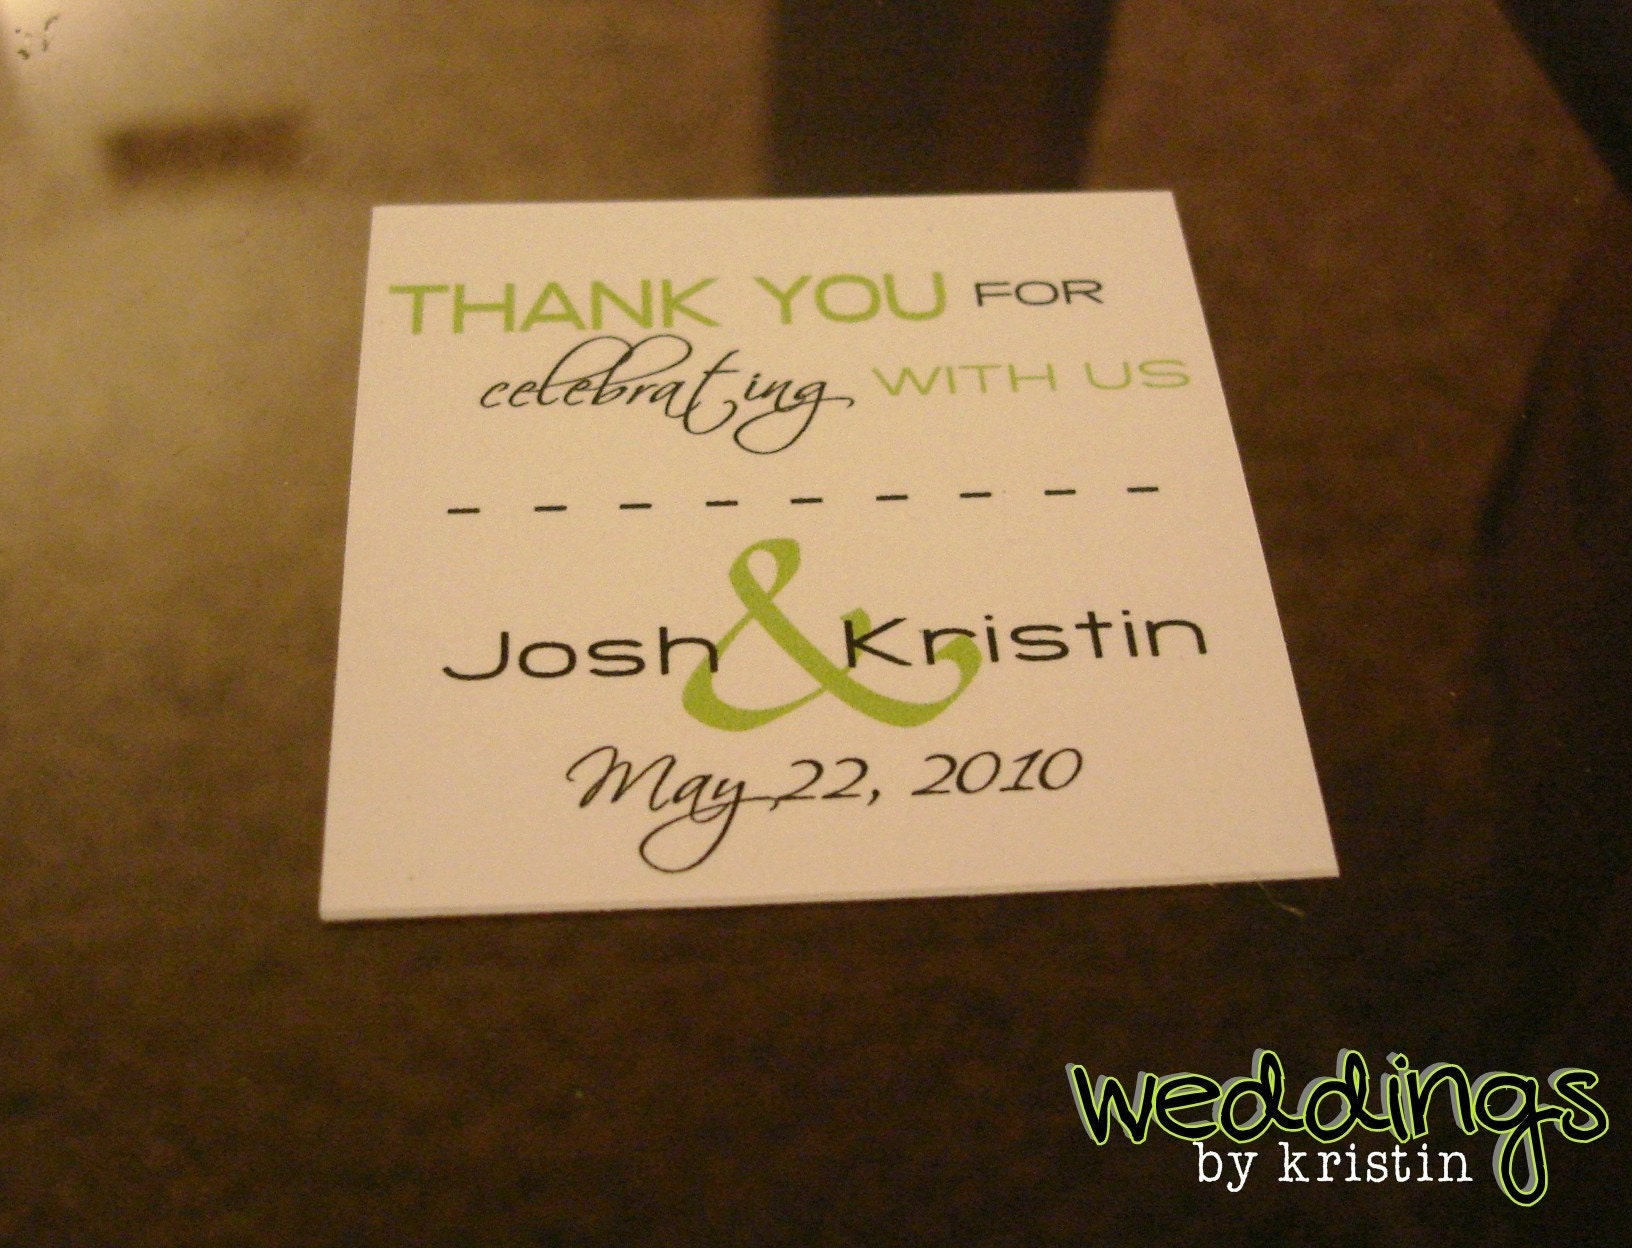
So I quickly sat down and came up with an idea of a photo frame for the pictures so our guests could take their picture home and do what they'd like with it, and it would have our names and wedding date on it, along with a nice little Thank You message.
Here's what I came up with:
(sorry for the crappy quality, I had to take it with my webcam since I don't have my computer cord)
 

I debated putting a magnet on the back of them all so they could easily be put on the fridge, but I decided that was an unnecessary expense, and some people might rather put them on a memo board, etc.  So where it stands now, is that about 200 of the 300 are completely finished.

Then, a couple weeks ago I got an email from Vistaprint like usual, and one of the freebies was a small banner.  So I laid out a design and uploaded it to have it printed.  I believe I paid no more than $5 for the following (and that was only the shipping).

(again with the crappy picture)

It came rolled up as a banner, and I took it into my mom's work and had the framer mount it onto GatorBoard which is a very stiff foam board.  I went in to pick it up today and her boss was ringing me up for that and a can of paint, and he said, "Don't worry about the board, we'll throw it in for good luck."  How sweet?!  I would have only been paying $10, but it was an unexpected surprise.  I'm going to place it on a large black easel (that I'm borrowing from my own work) next to the booth which will be in the entry hallway into the reception.
At the bottom it reads: "To preserve your memories, please place your fabulous photos in the photo mats found at your seats, enjoy them as our gift to you!"

I'm going to make small matching tents to place on each table, to direct the guests towards the booth.  This has become one of the more exciting projects for me, and I'm loving the way it's turning out.

Sunday, February 21, 2010

To Do List, Version 2.0

Just over a month ago, I posted my first tentative list of things to do.  Here it is again with hopefully some lines crossed through it and things accomplished.  But there will be many add-ons now too I'm sure.

(From January 18th, changes in red)
-Decide on a DJ We have already signed with our DJ company, but we missed a couple "Meet the DJ Nights" already and have yet to pick out who we want
-Go and talk to the florist We have a deposit down, I just want to finalize what is in season, see what I've changed my mind about since last spring.  And I need her opinion on how to make my hurricanes work as vases.
-Get Mr. T to pick out a wedding band so I can buy it It's now picked up and waiting for the big day!
-Start looking and maybe hopefully book our honeymoon At first we didn't think we could do one, but I've been home working and will do so again in Feb. and March so I've decided to devote that money, plus a large graduation gift to it.
-Finish the invitations and get them mailed out I have about 80 of the 140 completely finished.  The rest should be done in the next week hopefully.
-Finish the coasters I started I'm about 1/3 of the way through them
-Finish the table squares I have 20 of 30 ironed and the edges are ready to be sewn.  I need to iron the rest and then sew around them all.
-Finish the favors I believe around 200 of the 300 are done
-Put the handles on the totes I made for the girls
-Finish the felt flowers as the finishing touch on the clutches
-Pick up my dress and have Zan alter it
It fits perfectly but it needs to be hemmed still
-Get the bridesmaids' dresses dry cleaned and altered We have all the money for them now, and we're going to alter them first, and then get them dry cleaned so they're nice and pressed for the wedding.  The girls will be getting altered as they're in town.
-Finish my guestbook
-Buy and personalize the aisle runner
-Make all of the bows for the tulle swagging at the reception
-Get the rest of the hurricane tops for the vases/candle holders for centerpieces from Jane
They're in the basement of the store somewhere, I need to find them They're all cleaned, and organized in new tupperware containers.  It's labeled for the reception.
-Get the votive holders and votives from Jane She found tealights for $0.20 when she was at the gift show last week, so I'm going to do that instead of tealights like I originally planned. I picked them all up from Jane.  We put all of the votives inside of the holders and pulled up the wick so they're ready to light.  They're also organized in new containers and labeled to go.
-Go and talk to Yvonne about the cake My mom's friend, who is an amazing cake person is doing our cake and I need to talk with her about what I'm thinking.
-Get all of the guys in and get them fitted for tuxes by the beginning of February
We're getting them from a local shop in town and our wedding falls during Prom season so we need to get in there early.
Right now we have Josh, his brother, his dad, and two of our ushers in.  Still 7 to go.
-Finish the flower girl dress I'm working on or find an alternative if it fails
-Take the "compatability test" our pastor wants us to do and then go through the counseling with him in MN
We've taken the test and it's getting graded.
-String the letters inside of the wreaths
-Make more of the escort cards for the people I already know are coming for sure
-Do up some mock wedding programs so I know what I want when it's time
-Get cocktail napkins from the reception I talked to the guy and he said I can get some ahead of time to stamp on and place at the bar.
-Gather the rest of the wedding pictures from all of the family members I have 13 people left to get them from, but I did buy all of the frames to put them in.
-Call the hotel and see how the blocked rooms are doing
-Make invitations for the rehearsal dinner and decide on any decorations The design is finished on my computer, they just need to be printed.
-Finalize the music for the ceremony and reception
-Call the lady who plays the organ at the church and see if she can do our wedding She can't do it, so I need to find someone new.
-Make the pocket squares for the guys
-Get everything together for the out of town bags We have been collecting maps of the downtown shopping area and the town and such from our Chamber of Commerce.  I still want to put together a list of the churches in the area and their service times in case anyone wants to go on Sunday morning.  And then I need to make a trip to Sam's Club and stock up on things to put in their bags.
-Put together the kids' favors
-Finalize transportation plans for the day of My aunt's ex husband owns a bus and he is going to let us use it for the day of.  It fits thirteen so it  could take the wedding party back and forth.  We're also looking into renting a larger bus from my parents' friends that can act as a shuttle to and from the hotels.
-Gather the rest of the supplies for the bathroom baskets These are done! A nice trip to Dollar Tree solved this one.  A post will be coming shortly!

(Updated since then)
-Figure out what Mr. T is doing for his guys' gifts 
-Get the favors for the rehearsal dinner into cello bags with tags
-Make the wraps for the bridesmaids
-Do a hair trial so I know what I want
-Sew in my wedding dress label
-Buy stamps for the invitations
-Get/make pens for the guestbook
-Song request cards to fill out during cocktail hour?
-Get the fleece and make the blanket for Liam, to match Ella's
-Figure out and make the flower girl basket/purse/pomander
-Make the cosmetic bags I got fabric for
-Find wood and paint signs for directions


That's where I'm at for now, and I know there's a whole lot more that I can't even think of!

Friday, February 12, 2010

Giveaway Winner!

I'm happy to announce that my first ever winner is Miss Kelly...aka KJPUGS!!
Here's proof that I did it nice and fairly.  I just entered all of your names into Excel in the order which the comments were received and had random.org draw a number.

Kelly, I'm letting Kristin of Everyday's a Memory know that you won.  You can contact her at her Etsy shop to start the process of your two charms.  They have been paid for, along with the shipping so you're good to go!!

On a side note, I probably won't be around for awhile.  I'm back home in IL for 1.5 weeks and I'm heading down to Springfield this weekend to work Cheerleading State with my bosses.  We've got about 5 hotel rooms so it should be a great time!
But when I do get back to regular posting I've got lots of things to share with you.  I made a very successful trip to Dollar Tree the other day, and the first batch of my invitations are completely finished. 
I'll see you guys soon, have a great weekend!

Monday, February 8, 2010

My First Giveaway!!

Allright guys, I was thinking about holding out until I hit 100 followers, but I just couldn't pass this up.
The other day I was on Etsy, making Alchemy requests and such, and one of the ones I was doing was for part of my Bridesmaids' gifts.  I was looking to have two charms made for each girl; one with a picture of the two of us, and one with their initial.

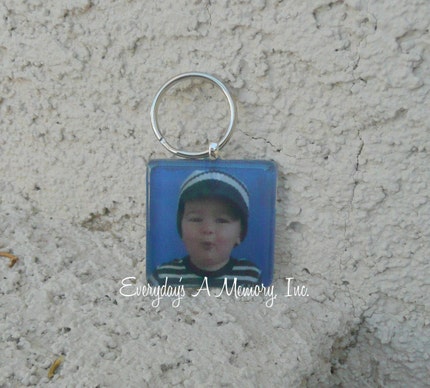
Everyday's A Memory came up with the best idea and the greatest price, so I decided to go with her.  She is going to create 10 glass tile pendants for me, 5 in square, and 5 in rectangle.
 
7/8"x7/8" square
 1"x2" rectangle.
Both will have the bail on them, not the keychain.  Then I decided on the pictures I wanted to use, and made up some quick artwork for the initials I wanted to use and sent them all her way.
Each girl will be getting a rectangle with her initial, and a square with a picture of the two of us.  I'm going to have these tied around their bouquets, and then they can use them afterward for a necklace or whatever they would like.
She came up with the amazing price of $15 plus $5 shipping since I was doing a large custom order.  Now I'm just waiting for them to come in the mail.  Kristin was amazing to work with and I can't wait to see how they turn out!

So now here's where the giveaway comes in!!
I purchased an additional set and paid for the shipping, so if you're the lucky winner you will get 1 rectangle and 1 square pendant customized to your specifications shipped to you!  I also set up with her, that if you buy 4 or more sets you can have the same discounted price of $1.50 per charm.
After winning the giveaway you will work directly with Kristin to create your charms and then she will ship them to you.  Shipping has already been paid for the two charms you're winning, but if you decide to purchase more, you will be responsible for the difference.

The giveaway will end Thursday February 11th at 8PM central time.  I'm leaving early Friday morning for the weekend so I'll be drawing a name on Thursday night and probably announcing the winner that night as well.  The winning name will be chosen at random.  For shipping reasons, this giveaway is only open to US residents.

So here's how you can enter. (You may do one or all of the following).
Please leave a separate comment for each entry.

1st - Become a follower of my blog, and tell me that you are. (1 entry)
2nd - Follow me on Twitter, and comment with your username.(1 entry)
3rd - Go check out Everyday's A Memory, and heart her shop or your favorite item.  Let me know that you've done so. (1 entry)
 4th - Blog about this giveaway and leave me the link. (4 entries)
5th - Tweet the following Check out the #giveaway @happilyafterall is having  for a set of custom glass tile pendants! Go check it out http://tinyurl.com/yfxowxy (2 entries)

So that's a total of 9 entries!!  Good luck and remember the giveaway ends this Thursday at 8PM.

Friday, February 5, 2010

Non Wedding Related: TV Stand/Dog Kennel

I just wanted to share a few pictures with you all from our latest project.  When we were home in IL a couple weeks ago, I talked Mr. T into building a table with me to fit over Chief's dog kennel.
After a quick trip to Menards, we came away with the wood and a brand new toy he wanted to use to build it that I bought him that will double as a birthday present (in March!)
We spent the next day out in my dad's shop and this is what we created.
It slides down right over the kennel, so we don't just have a big kennel sitting there in the way of everything.
We got it all built in a day, and then I stained and varnished it while he was back up in MN working.  It takes up so much less room than the old dresser our landlord left behind.

Thursday, February 4, 2010

Corn Bread Taco Bake

This is definitely the most delicious recipe I've made in the last 4 days since I've started this.  I've never even really been a fan of corn bread, but this, it was GOOD.

Here's the original recipe.

Ingredients
1 1/2 lbs ground beef
1 pkg taco seasoning
1/2 cup water
1/2 cup chopped green pepper
8 oz can tomato sauce
8 1/2 oz pkg corn muffin mix (1/3 cup milk and 1 egg)
2.8 oz French Fried Onions
1/3 cup shredded cheddar cheese
Directions
In a skillet, brown the meat, then drain.
 
Return the meat to the skillet.   Stir in the taco seasoning, water, green peppers, and tomato sauce.
 
Pour into a 2 quart casserole dish.
In a separate bowl, prepare the corn muffin mix according to the directions on the box.
Mix in half of the french fried onions.
Spoon the corn muffin mix on top of casserole and spread to the edges.
 
 Bake, uncovered, at 400 degrees for 20 minutes.
Top corn bread with the remaining french fried onions and the cheese.  Cook for 3 more minutes.

Makes 8 servings.

Spoiler alert!! If you look closely you can get a sneak peak at my invites in the works sitting on the table!   And there's my lovely Cricut =]

Nutritional facts for 1 serving: 363 cal, 14.7g fat, 589.5mg sodium, 28.4g carb, 1g fiber, 20.5g protein


My Custom Jewelry From Etsy: Part One

So yesterday I spent a few hours on the couch with Chief playing around on the computer.  I spent that time talking with Etsy vendors about some custom jewelry.  I put in a custom Alchemy request, and then proceeded to talk with 9 or 10 people about what they could do with my vision.
Here's what I was thinking:
I saved a picture from someone's shop and I can't remember where I found it, but it was from awhile ago.
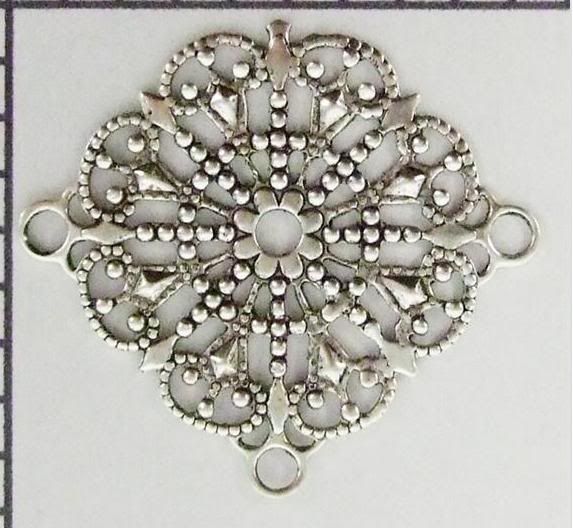
I'm looking for a necklace similar to the first picture, maybe with a third strand. Or with the second strand being pearls and crystals as well instead of a chain. I like the size of the pearls, and how they are mixed in with the swarovski crystals.
I kind of like the brooch in the second picture better because it has more detail.
If possible, and the price will increase with add-ons, I would also be looking for matching earrings and possibly a bracelet.


The first 6 or so were doing their own thing, and didn't really get was I was hoping to accomplish.  And then someone finally got it.  We emailed back and forth for quite awhile and finally came to a decision.
She actually knew where to get the exact filigree as the first picture.
 
She is going to add a large rhinestone to the center of it, and clip of the third attachment point.  We decided instead of having a chain as the second strand, we're going to do a mixture of white pearls and clear crystals like in the first strand.
Then she is also going to do a bracelet with the same focal point and double strands that match the necklace.
Both of these she is making for me for an awesome price of only $43.65 including the shipping!!
I sent her Paypal money for half of the amount, and she ordered the couple of parts she needed tonight.  Which means she'll get started on them this weekend, and out in the mail within about 1 1/2 weeks.
I can't wait to get them and try them on with my dress =]

Have any of you made Etsy purchases for your wedding or other things?

p.s. Here's a great giveaway for an 18x24" poster at Shooting for a $3,000 Wedding.
p.p.s. Here's another awesome giveaway from One Bored Mommy for all of the Rembrandt Whitening Products and a couple new KY products, perfect for Valentine's Day! 
p.p.p.s Miss Pug finally reached 100 followers and is giving away a Name Change Kit to celebrate! 
p.p.p.p.s.  One more!! Check out this Vistaprint giveaway at With this ring I thee blog!! 

I have to add just one more!! It's a $25 GC for MyWeddingFavors.com 

Wednesday, February 3, 2010

Pot Roast Stroganoff

From our dinner tonight.... original recipe found here.
It was good, but not as good as the last two nights.

Ingredients
1 Tbs butter
2 cups water
1/4 cup diced red onion
1 small can of mushrooms - sliced
10 oz extra wide egg noodles
1 package fully cooked pot roast with gravy
1/4 cup light/fat free sour cream
 
 Directions
In a skillet over medium-high heat, place butter, noodles, onions, mushrooms, and water.
Cover and bring to a boil.
Uncover once it's boiling.  Continue boiling for 5-6 minutes, stirring occasionally.
Meanwhile, separate the gravy and remove meat from the package; cut into bite size pieces.
Stir roast, gravy, and sour cream into noodle mixture.
Cook uncovered until thoroughly heated.  About 3-4 minutes, or until noodles are ready.
Makes 6 servings.
My plate.  I'm realizing what looks like a little, can be really filling!
We topped it off with another romaine/spinach salad.  I added a glass of Moscato to the meal....yum!  I was actually able to squeeze two glasses into my daily calories today.  What a nice treat =]

Nutritional facts for 1 serving: 426 cal, 1.4g fat, 369.1mg sodium, 37.2g carb, 1.5g fiber, 23.8g protein
Enjoy!

P.S.  I've lost 4 pounds since starting this healthy eating/calorie counting on Saturday night!
Related Posts with Thumbnails